Creating a ClarionCall group allows you to setup a new group that is unaffected by synchronisations and subsequently does not have to appear in your School’s MIS or database records.
It is a group that is available within ClarionCall and can be completely administered through your system. It is treated like any other group in ClarionCall. It can be very useful for setting up temporary groups for activities such as school trips or sports days.
To setup a new ClarionCall group, perform the following:
1. Click the “New Clarion Call Group” button at the bottom of the ‘Message’ screen.
2. The system will display the ‘New Clarion Call Group’ screen. You are able to set the following:
- Clarion Call Group name – this is the only mandatory field. Enter the name of the group you would like to create. This is the name that will appear on the ‘Message’ screen.
- Active from? (dd/mm/yy) - when creating a ClarionCall group it is possible to specify a date range, during which the group is “active” and can therefore be used to text, e-mail etc. members. If this is required enter the start date in the associated text fields. Alternatively click the “Choose” button to select the date from an on-screen calendar.
- Expires? (dd/mm/yy) – specify an end date for the ClarionCall group if required.
- Keep group when expired? – check this option to keep the group on the ‘Message’ screen after the expiry date.
3. Click “Create Group” to complete the group setup.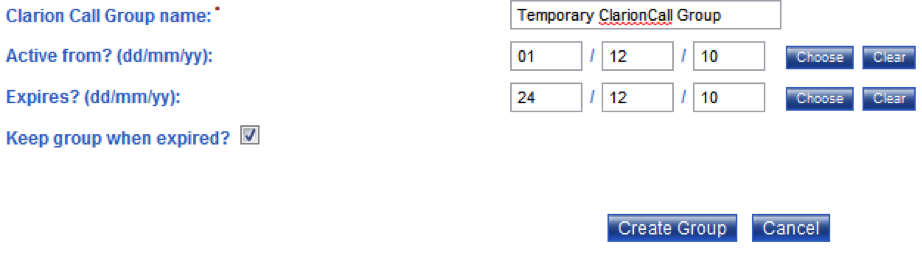
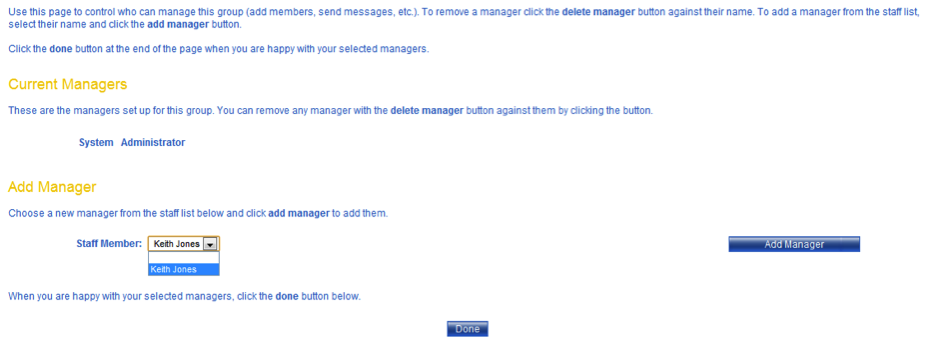
4. The system will now display the ‘Edit Group Managers’ screen, which allows you to set up any additional managers for this group. By default, all School Administrators will be set up as current managers (they cannot be removed). If a manager has created this ClarionCall group, they will also be set up as a current manager. If you do not wish to add any other staff members as managers of this group, continue to step 5. If you would like to add another group manager, select a staff member from the drop down menu and click the “Add Manager” button. Click “Done” when finished.
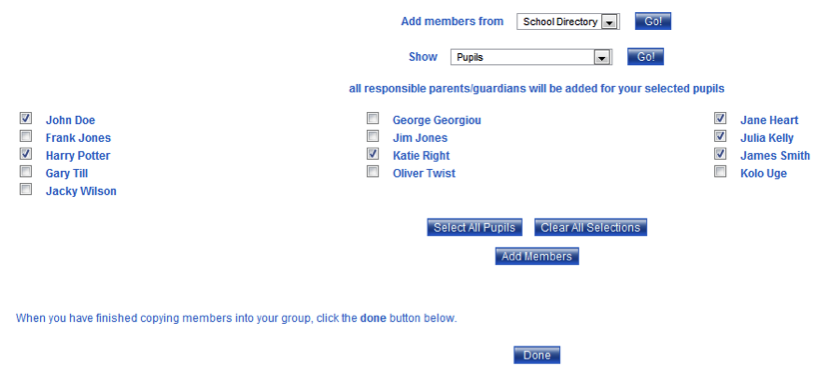
5. The system will now allow you to add members to the new ClarionCall group. Select a group from the “Add members from” drop down menu and click “Go!”. This will display a list of all the members belonging to that group. To add a selection of members, check the box associated with the member’s name and click “Add Members”. Alternatively click “Select All Pupils” and then “Add Members” to add everyone from the group. Once you have finished adding members, click “Done” to finish this process.