| Click here to view or download a PDF file of this guide |
The Sport Zone is a flexible and intuitive application that makes arranging and managing fixtures and matches simple. Ensuring that the Sport Zone is set up correctly will make the process of creating fixtures and matches a quick and easy task. There are five main steps to setting up the Sport Zone, which are detailed below.
To access the Sport Zone set up page:
1. Ensure you are logged into the Staff Message Centre.
2. Click the ‘Setup’ panel list item in the Sport Zone on the Dashboard.
Setting up your School’s Profile
1. Click ‘Home Profile’ in the left-hand menu.
2. In the ‘Basic’ section, enter the following details:
a. School Name.
b. Alias
c. School Address.
d. School Postcode.
e. School website.
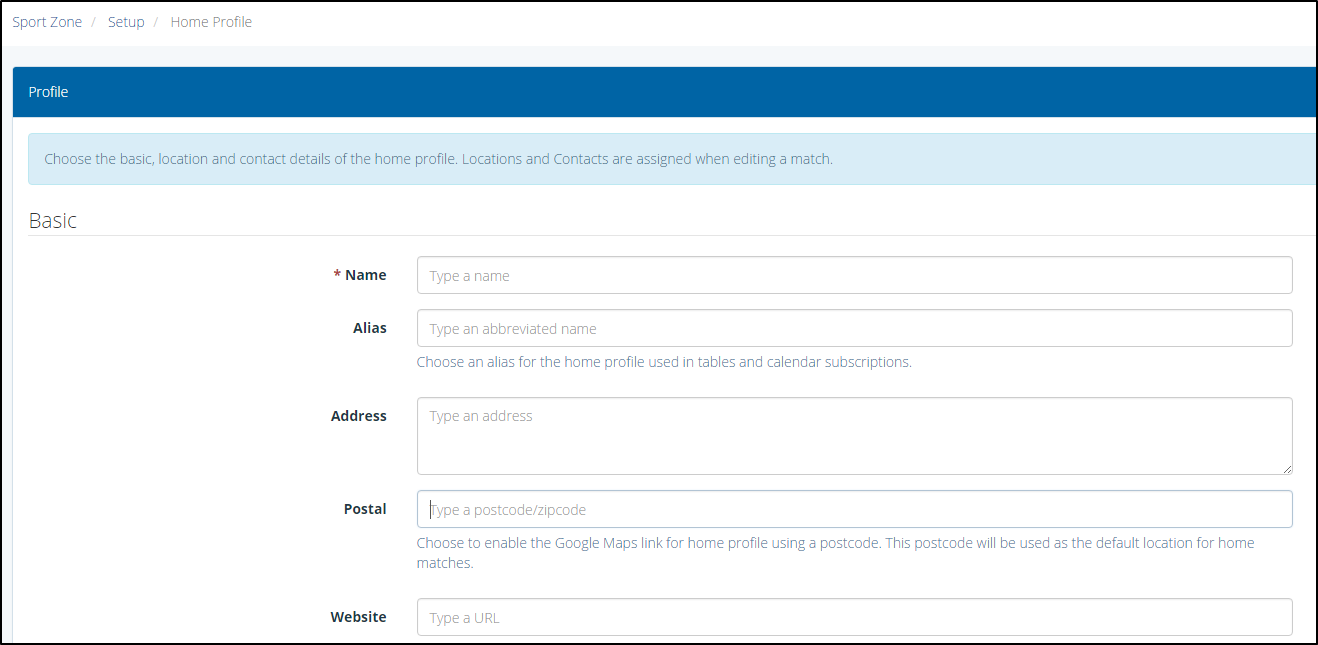
The Basic section of the Home Profile page
3. In the ‘Locations’ section, enter locations of school sports pitches.
a. Enter the name of the location.
b. Enter the post code.
And click ‘Add Location’.
4. In the ‘Contacts’ section, enter the following details of the main sports contact.
a. Their name.
b. Their position.
c. Their contact number.
d. Their email address.
And click ‘Add Contact’.
5. Click ‘Save after entering these details.
Setting up Sports
1. Click ‘Sports’ in the left-hand menu.
2. Tick the tick-box next to the appropriate sport.
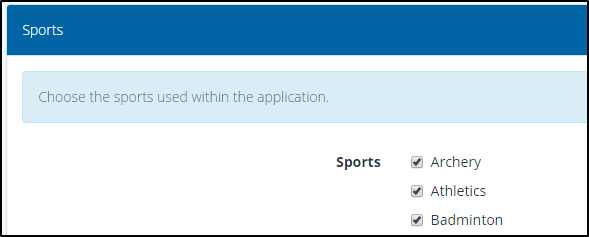
The Sports setup page
3. After selecting the appropriate sports, click ‘Save’.
Setting up Coaches
1. Click ‘Coaches’ in the left-hand menu.
2. Click the appropriate Sport. Enter the Sports Coach’s name, click the search icon and select the name.
3. Click ‘Add Coach’. Repeat as necessary.
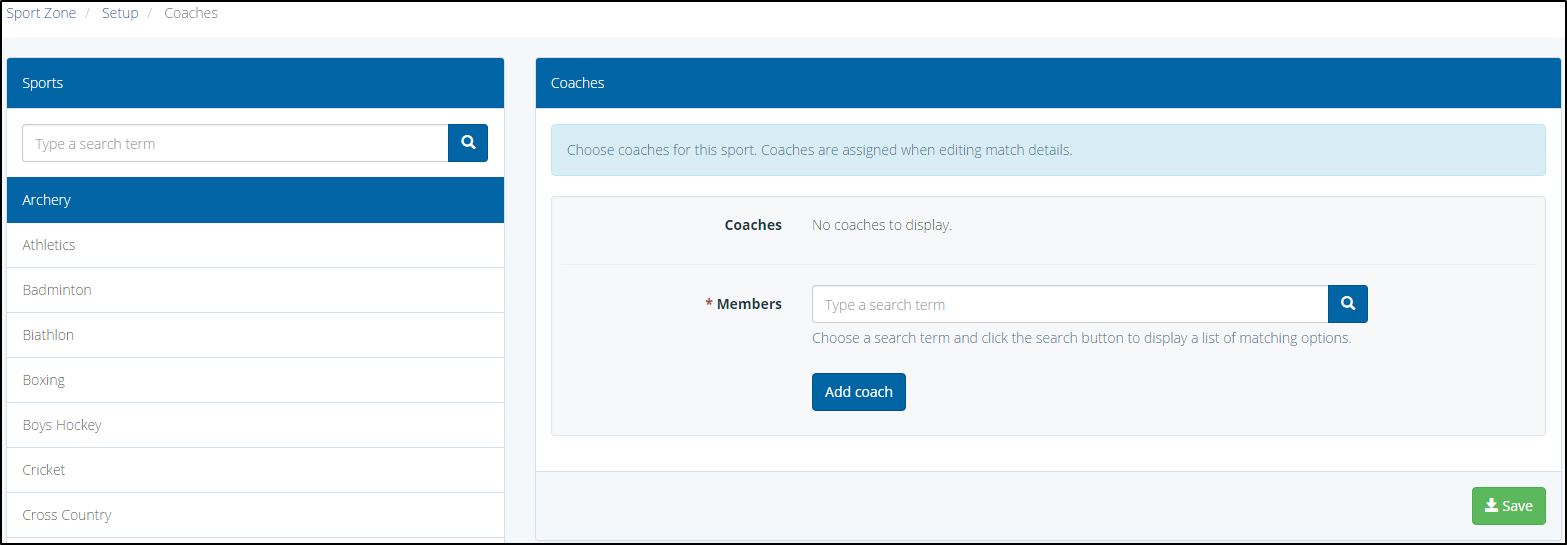
The Coaches setup page
4. Click ‘Save’ after adding all appropriate coaches.
Setting up Teams
1. Click ‘Teams’ in the left-hand menu.
2. Select a Sport in the ‘Sports’ column by clicking its name.
3. Enter the title of the team, tick the tick-box next to the appropriate coach, and enter a team alias.
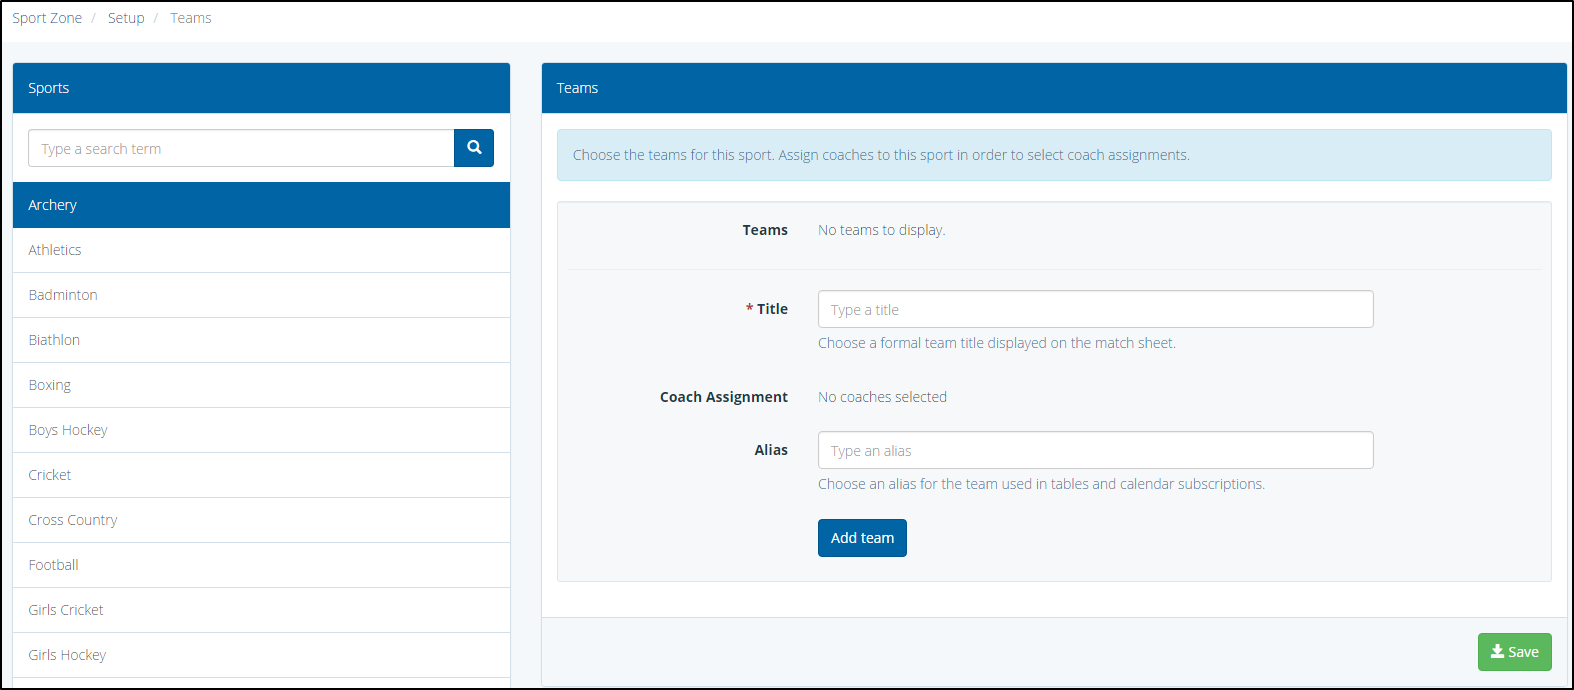
The Teams setup page
4. Click ‘Add Team’. Repeat this process as necessary. Click ‘Save’ after all the Sport’s teams have been added.
Setting up Positions
1. Click ‘Positions’ in the left-hand menu, and then click the appropriate sport.
2. Enter a number, and the position’s title. Click ‘Add Position’.
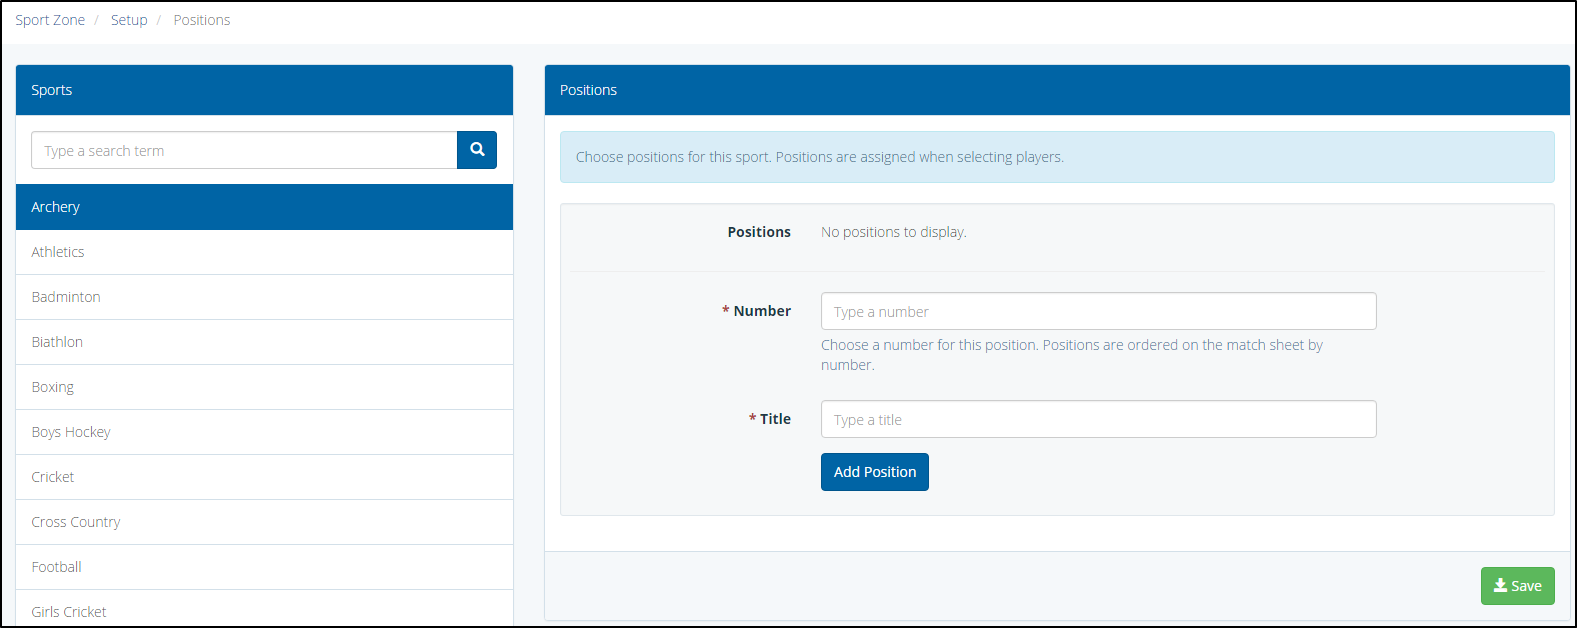
The Positions setup page
3. Repeat this process as necessary. Click ‘Save’ once all positions have been added.
Setting up Notes
1. Click ‘Notes’ in the left-hand menu.
2. Click the ‘+New’ icon.
3. Enter the note’s title into the ‘Title’ field, and the note into the ‘Message’ field. An example note could be: ‘Gumshields are compulsory’.
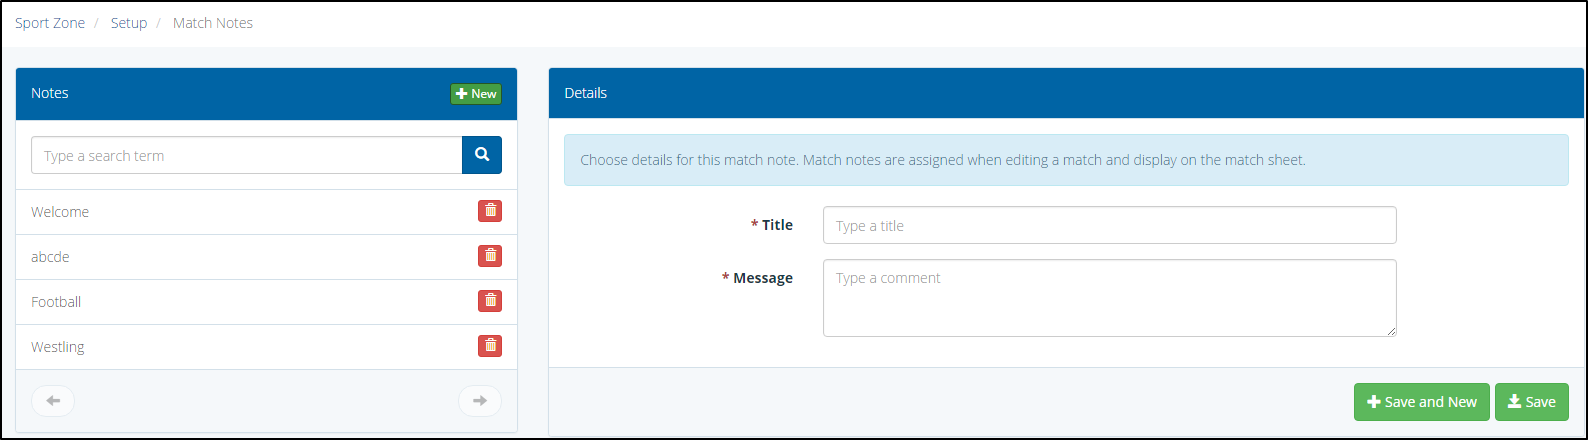
The Sport Zone ‘Notes’ setup page
4. Click ‘Save & New’ when these details have been entered.
Setting up your Match Sheet
1. Click ‘Settings’ in the left-hand menu.
2. In the ‘Fields’ section, use the ‘Coach Details’ and ‘Contact Details’ buttons to select whether you want to display these on your match sheet, and enter a Footer Message.
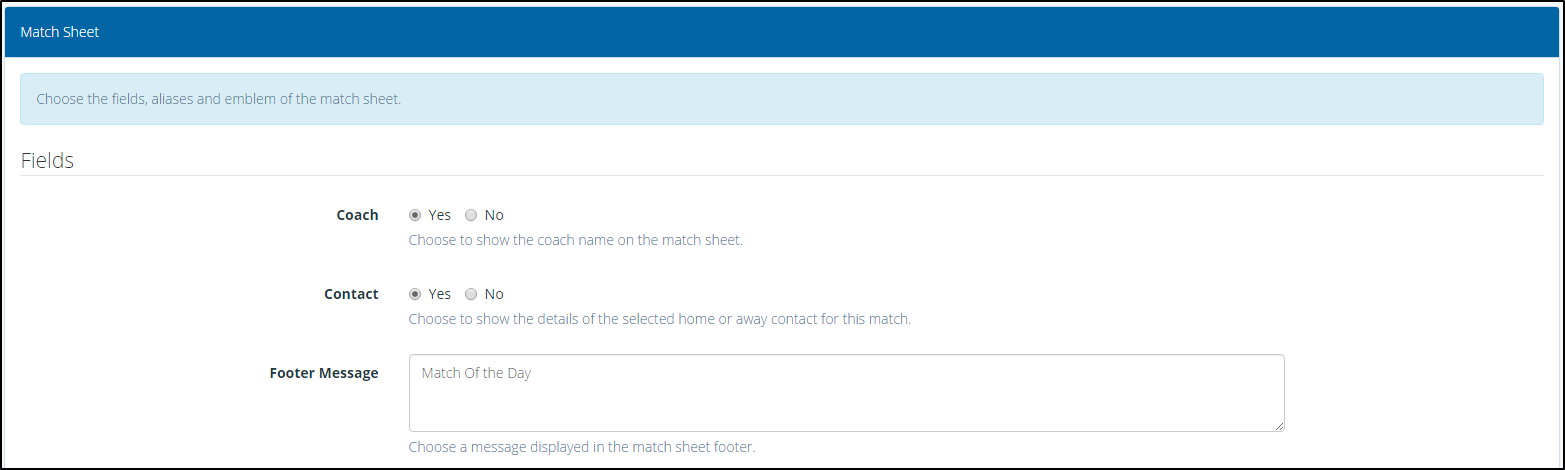
The Match Sheet setup page
3. In the ‘Aliases’ section, create aliases for the following details:
a. Meet Time.
b. Depart Time.
c. Start Time.
d. End Time.
e. Return Time.
4. In the ‘Emblem’ section, upload a school logo/emblem to display on the match sheet.
5. Click ‘Save’ after making any changes.
These are the five key stages to setting the Sport Zone up correctly. Once completed, you can begin to create your sports fixtures and matches.


